Showing posts with label Vinyl. Show all posts

Thursday, October 24, 2013

Vinyled Pan


I made pumpkin bars for teacher appreciation at school and needed to have the pan I was sending them to school labeled.  I decided to decorate this lid very similar to what I did to a container last year for school.  I only decorated the lid and used Oracal 651 vinyl that will last through washings.  Last year's container is still going strong.

Monday, August 26, 2013

Laundry Sign

I have seen a lot of signs on Pinterest that give me a giggle so I have been trying to make some with my own spin on things using up some of the supplies we have around the house.  I really like a lot of the laundry signs or displays for missing socks.  Everyone has missing socks, and I am tired of the pile on my dresser, so I thought I needed a sign.  I used up some left over paint from one of the bedrooms to paint a board.  Then I ran some washi tape along the top.  I used my Silhouette to cut out the saying in vinyl and attached that.  I ran washi tape over the top of some clothespins and then mod podged over it to make them stick.  I coated the whole board in polyurethane and let it dry completely.  Then I used tacky glue to attach the clothespins to the board.  Some of my inspiration for this came from Here  and Here.  However if you type in Missing Sock in Pinterest you will get a whole slew of fun options!

Thursday, June 27, 2013

Canvas Project with the Kids

I bought a package for skinny 4x4 canvases thinking that we would do this project with the kids for my daughter's birthday party since she requested that they paint.  Ooooh I am so glad I ended up vetoing that idea to pain with a bunch of 4 and 5 year olds! I had the canvases so I thought that we could have some fun with them around the house.
I used my Silhouette and cut out a vinyl unicorn as requested.  My daughter wanted a pink unicorn so I had her paint the canvas all in pink and then let it try.  I then attached the vinyl unicorn and had her paint the canvas again in purple.  After she was done painting we peeled up the vinyl and had this.  She chose some ribbon out of the stash to make it into a door hanger for her room.
My 2-1/2 year old is into trucks, machines, etc.  I had him pick out which machine he wanted to do and he chose a digger.  I stuck his vinyl digger straight to the canvas and let him have a go with the paints.  Once he was done we peeled it up and had a white digger silhouette.  He wanted to be like big sis and picked out some ribbon so we could hang his project in his room.

Fun with Vinyl

 So I had a little fun with my vinyl this week.
 I know I've seen this one somewhere, but can't remember where exactly.  I put this on the tub in our master bath.  The hubby actually noticed it the first day it was up.   
 We repainted all of our main floor and so this kid art display had to come down, along with my vinyl.  So I finally got around to putting up a new "Masterpiece" sign on the wall.  I previously had used a font called FREEZE that I ended up being not too fond once it was cut and on the wall.  So when I recut it I switched it to MY OWN TOPHER font. This display idea came from here and it works great for displaying the kids art.


Saturday, June 15, 2013

Wedding Gift

 One of my cousins got married this month and I created this card and variation on a split letter for them as part of their wedding gift.

Monday, June 10, 2013

You've Got Mail


First project on the Silhouette for me!  My husband helped me with this one - I think mostly to ensure that both sides weren't OU haha!  We sanded and spray painted the mailbox to make sure we had an even surface and then traced logos and cut them out onto adhesive vinyl with the silhouette.  Then we just peeled and stuck them on... GO STATE and BOOMER SOONER! : )  


Monday, May 27, 2013

Split Letter


I used my Silhouette and designed this split letter for a paying customer!  The R is in Anabel font.  It's a pain to use as the cut lines aren't quite right always, but I am getting better at using the software that I've found some ways to adjust cut lines as needed.  I used Oracal 631 vinyl as it is sandwiched in between 2 panes of glass and isn't meant to be used outside

Thursday, March 14, 2013

Vinyled Container

 
I had some cookies to drop off at school for the PTO lunch, but when I got to school I realized that my name was NO WHERE on my container and of course I didn't have a Sharpie in the van.  I ran home and decided I could do better than a Sharpie, so I pulled out my Silhouette and my huge PILE of vinyl and cut out a WHOLE bunch of different sized circles and my saying and stuck it on.  Of course, it took longer than expected with a toddler at my feet, or climbing on the table, or whatever else he thought he should be getting away with while I tried to get this done.  It turned out GREAT!  I want to vinyl everything!

Wednesday, February 27, 2013

The final cube

When I made my Nativity Cubes in December I was hoping to do it as a set of three.  However, finding these blocks around gift giving season is pretty difficult and I had to just go ahead and do the two blocks.  The cubes are finally back in stock this month and I picked up another small one to add to my display for next year.

Thursday, February 14, 2013

Valentine Day Gift Frame

For her Valentine's Day Sweetie Allison made this gift.  She found a quote she liked and cut it out on vinyl with the Silhouette.  Then she attached it to one side of the glass and put a piece of paper in the frame for an added pop of color.  For the other side she added a goofy picture of her and her Valentine.

Sunday, January 27, 2013

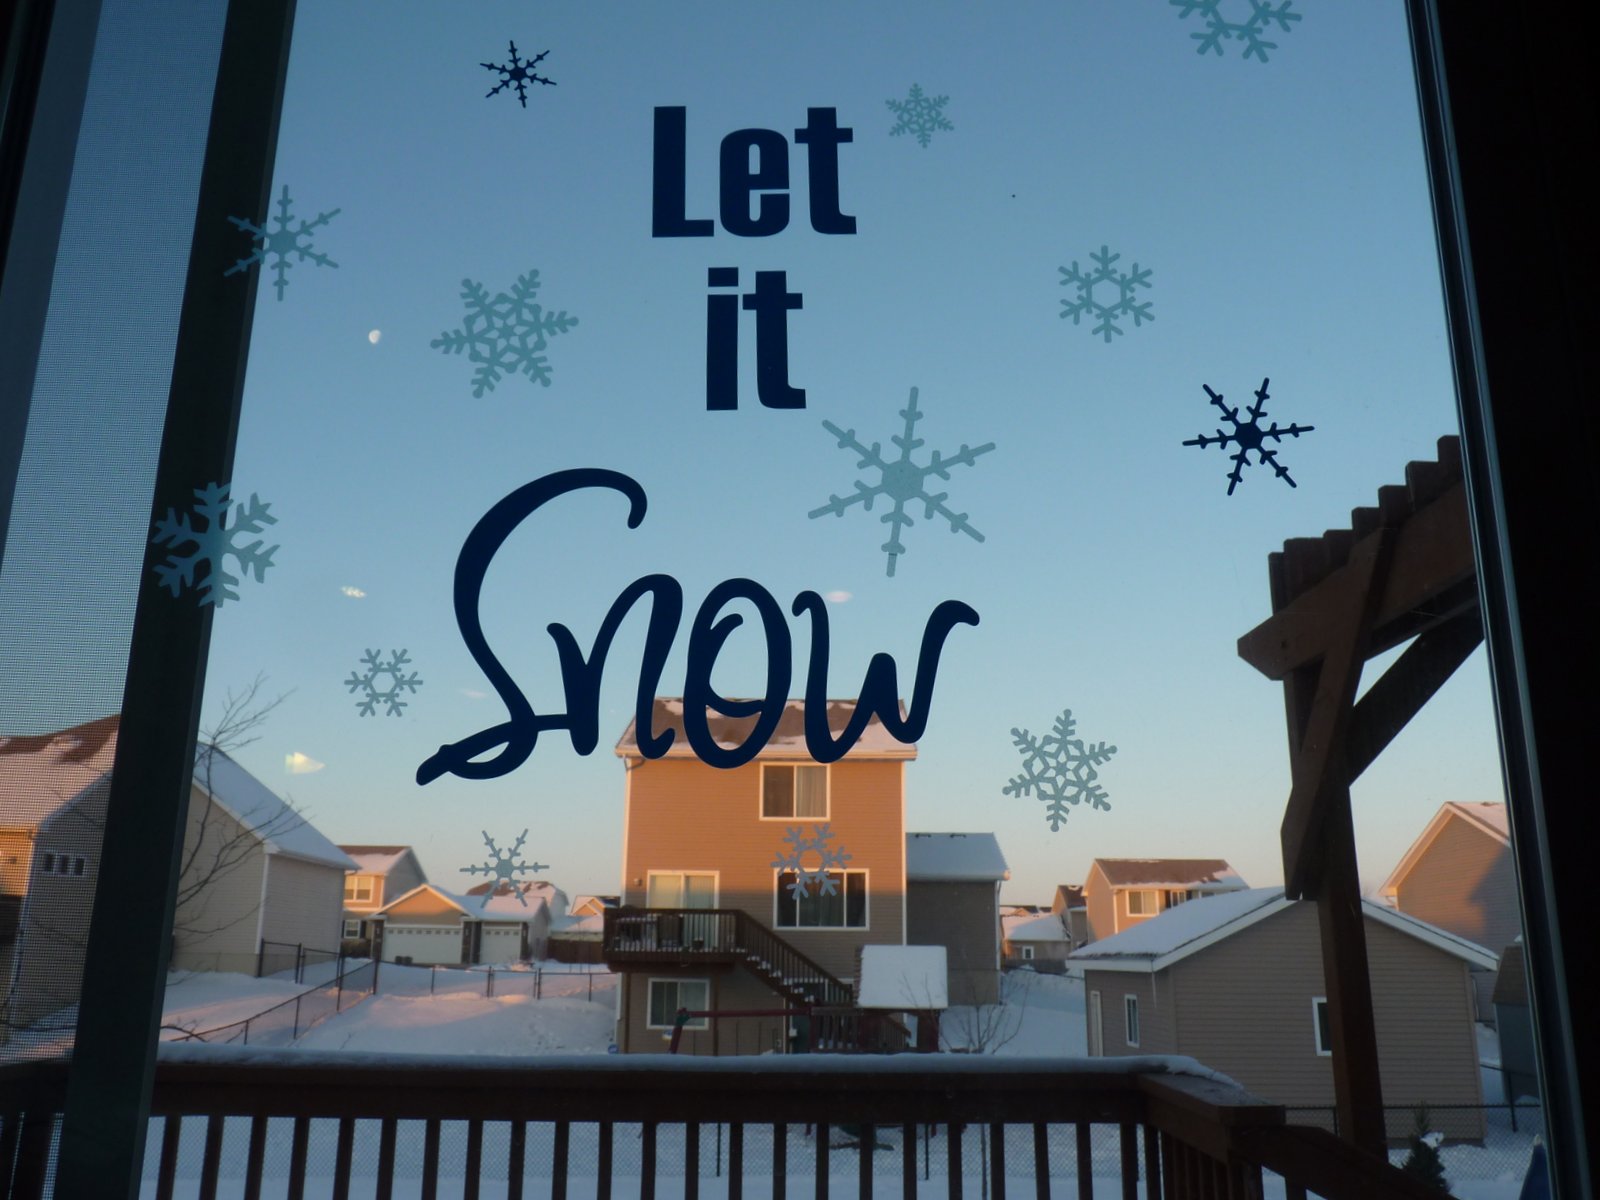
Winter Decorations

 
Since I need to start putting away my Christmas decorations, I decided that I needed to use some of my excess vinyl to make some winter decorations.  I found different snowflakes that I liked and the phrase online and just used my silhouette software to trace them.  I re-sized everything to get a variety of snowflakes and to get the words just the right size for my glass door.  I used almost a full 12x12 sheet of blue vinyl and a sheet of 8x10 blue frosted glass vinyl.  I tried to get pictures taken in both daylight and night light for you to really see what it looks like, but pictures just do not do it justice.  It turned out really well, and now I think I need to do this every month, and boy, do I have the vinyl stash to do this!

Monday, December 31, 2012

Christmas Ornaments

 
I bought clear glass ornaments at Hobby Lobby.  I squirted floor cleaner inside the ornament and then dumped out the excess.  Then, I put a bunch of extra fine glitter inside the ornament and shook it up.  The floor cleaner causes the glitter to stick to the inside of the glass ball.  Once that was completed, I used my silhouette to cut out the vinyl and I stuck in on the ornament.  I had plans to make a whole bunch of these this year, but somehow I only got this one vinyled.  Perhaps next year, I can make one for each of the boys.

Nativity Blocks

 This year for Christmas I made a bunch of Nativity Blocks as presents.  I bought Craft Blocks with the hole cut in the bottom so I could insert a strand of lights (100 fits).  Then I found a Nativity Scene that I liked at the Silhouette Online Store and cut out several on black vinyl.  I then adhered them to the blocks and tied a ribbon around the block.  I made 11 of these this year and people seemed to enjoy them.
This was the set I did for myself.  I have had the small block for a while and decided to expand the "scene."

Monday, November 26, 2012

Thankful Tree


For Thanksgiving, I made this tree.  I cut it out with my Silhouette in some brown vinyl I had lying around.  I found some nice oak leaf shapes online and traced them and cut them out of red, yellow, and orange card stock.  I would have used adhesive backed card stock if I would have had the right colors.  Instead, I them up with just tape rolled on the back.  I asked people at our Thanksgiving to write down what they were thankful for and put it somewhere around the tree.  I think it turned out great and hope I remember to do this again next year.  It was especially good for the little ones to see all the things people were thankful for.

Sunday, November 4, 2012

Welcome Home Steps

Today I cut out some black vinyl on the Silhouette to give our stairs from the garage into the house a little face lift.  I used my Mod Podge Matte Sealer to coat the vinyl and stairs so hopefully it won't peel up after the first few times we step on it.

Wednesday, October 31, 2012

Ikea Table to Play Table

A few months ago I had my sister stop by IKEA and pick me up a Lack side table ($8 - awesome!).  I had ideas brewing after seeing this and this and this. After months of the kids just using it as a plain old table, I finally got around to modifying it.  I ended up doing an assortment of activities.  They play with their duplo blocks quite a bit so I super glued some duplo plates in one corner.  Then I used my Silhouette to cut a variety of shapes out of vinyl and then stuck it right to the table.  I did a place setting as this table sits close to their play kitchen and they use it quite a bit to stage meals.  I turned the plate into a clock so we could practice numbers/telling time.  I did a small race track (which seems to be their favorite part of the *new* table.)  My oldest has recently got into mazes so I figured it was a perfect way to use some of the Silhouette clearance shapes I got at one point in time.  I cut three different mazes for the center of the track and she can trace her way out with her finger.  All in all I was pretty happy with the outcome and figure if they vinyl starts to peel off, well just an excuse to do different activities!

Tuesday, August 28, 2012

Split Letter Design

I've got a wedding this weekend for a close friend of the family (i.e. just buying something at Target doesn't seem appropriate).  I decided to make them a split letter like I made for Brandon and I.  I used Anabel Alt for the background T and Garamond for all of the words.  I designed it and cut it out using my Silhouette and Oracal 631 vinyl.

Monday, July 30, 2012

Fun Projects for the Kids

Since it was so hot this month I did a lot of projects to keep the kiddos entertained since we are inside more now than in winter!
 First up we bought these colored wood shapes on sale at Michael's.  Then I hot glued them to Popsicle sticks.  Now we use them with our puppet show box (big cardboard box with a hole in it:)).  
 Saw this idea on the web, but for the life of me can't remember where.  I took paint chips and use my square punch to make holes in them.  Then I ran them through my laminator and put them all on a ring.  The idea is find something that matches the color of the chip.  This kept us busy for quite a long time.  We also expanded on this idea by using buckets and the first person to fill their bucket with items of a selected color won.
The kiddos bathroom is painted a sand brown and there is sort of a beach them going on so I decided to go a step further and get crazy with my Silhouette.  I cut vinyl shapes out and placed them all over the bathroom.  It ended up looking pretty great and my youngest likes to laugh and say good morning to the crab everyday since its about his level on the floor.

Wednesday, July 25, 2012

Melted Crayons

Well... with it being so hot out it makes you feel like youre melting, I decided Melted Crayon Art was the perfect July craft for me.  I'm sure you have all seen these plastering pinterest and it is pretty self explanatory for the how to.  However, there are some different versions - I didn't want to glue my crayons on so I melted them through the hot glue gun This worked perfectly and used waaay fewer crayons, until my glue gun backfired and broke halfway thru :(  I then resorted to melting the crayons with a lighter which was much more hazardous for my singed fingers but came out with the closest effect to the first half done by glue gun.  A very special thanks to Gail and Erin for figuring out and making my silhouette people out of vinyl - couldn't have done it without you! 

Sunday, July 15, 2012

Workout Inspiration

 I will take any extra push I can get while working out.  I saw this saying floating around Pinterest and it made me chuckle. I took a small canvas I had, cut out the lettering and tears from vinyl with my Silhouette and attached it with Mod Podge.  It now hangs by our treadmill.
 There are several races that my husband and I have done over the years and at one point we just started throwing our racing bibs into a file folder in the file cabinet.  We like to write the race, date, and our time on the back of the bib.  I thought there has got to be something better to do with those.  I did a google search and it brought me to Etsy, where a lot of people seem to have the same idea.  I wanted us to still be able to flip through our bibs so I opted to put them on big rings, with the most current bib facing front.  The quote is one I saw on a t-shirt at a race.  I cut out everything in vinyl on my Silhouette and used Mod Podge to seal it to the black canvas.  One thing I discovered is that apparently vinyl does not  like to stick to plain canvas.  I didn't have this issue before when I did canvases, but than again I painted all of those before I stuck vinyl to them.  I screwed cup hooks into the bottom of the canvas to hang the rings.  I was pretty happy with how it turned out.  So was the hubby - thank goodness as it was part of his birthday present!