Showing posts with label Heat Transfer. Show all posts

Tuesday, November 12, 2013

Birthday Shirts

 My son turned 3 this month and his two current obsessions are Legos and Angry Birds.  So I used my Silhouette and heat transfer to make him a shirt of each. They were a hit.

Saturday, October 26, 2013

Superhero Capes


This month, I made superhero capes for family photos!  I made 3 for my boys, and 2 for my niece and nephew (for Christmas).  My mom was here to help me out, but I did all of the actual sewing.  We mostly followed this tutorial using broadcloth for the outside, and matching superhero flannel on the inside.  We did modify the length's of the capes for the different children.  For my oldest two (4.5 and 6), I made them as long as I could and used almost the whole yard of material.  For the other three, I had to make them smaller (2/3 of a yard would probably be plenty of fabric for theirs.)

I also wasn't a fan of ties for capes (as it isn't the safest and let's face it, I'm too lazy to tie them every time they want to put them on) and Velcro (it gets dirty or strings in it and then it just isn't the nicest anymore...perhaps I'm too picky...)  Anyway, while looking at my options at the fabric store, I stumbled across some magnetic closures.  They are quite stronger than I need, but the boys are perfectly 'cape'able to put them on anytime they desire and no one will be strangled while playing with them!  Yea!
So here is one side of my neck part.  I cut two small slits for the clasps to go through.  I used some liquid nails glue, (aren't I crafty) and put it around the wholes to make sure it won't fray and to also give the fabric a little extra strength.
 
Then I added an extra piece of flannel to give it just a little more strength. (Did I mention that these are some strong magnets??)  The metal was also a tad sharp, so I thought this would help make these capes last forever.  Once they were sewed and turned inside out, you can't tell that the flannel is even in there.

Oh...and to add the jagged edges on the bottom of Batman's cape, I started with the cape folded in half.  Then, I cut out a triangle template.  I started at center, and just cut the jags in all the way to the edge.  It seemed a lot easier to do that then all of the measuring and marking that the instructions did.  I'm very pleased with how they turned out.

I also used HTV for the logos on the back along with my heat press.  It was SO much easier than trying to cut it out in fabric and sew it on! 

I think the pictures turned out great!  I am so happy that I made these and didn't pawn these off to Grandma to make!  Thanks to It Happened On Mulberry Street Photography for the wonderful photos!  Click the link if you want to see more of my boys!

Tuesday, September 17, 2013

First Birthday Shirts

 This month Erin and Gail took a request from a friend to make 1st birthday party shirts for her son.  The cute sock monkey on the brown shirt was a full iron-on purchased at Hobby Lobby.  The white shirt we designed with the silhouette to match the invites and used heat transfer in red, brown, cream, and black to cut out and heat press.  We learned a few new tricks in creating the shirts so that's always helpful!

Saturday, August 31, 2013

Baby Onesies


Here are some baby onesies I made up for a baby shower and a couple to have on hand.  I think these turned out great.  Once again, I vut out heat transfer vinyl with my Silhouette Cameo and pressed it with my heat press.  The tie dyed oneses are from the batch I made earlier this month.

Thursday, August 15, 2013

Back To School

 
Parker has a Spiderman backpack and Aiden has a StarWars backpack, so I put their names on their backpack using Heat Transfer Vinyl.  It looks great.  The only problem I encountered was that it did melt the internal padding, but I'm not worried about that with these backpacks.

Aiden also needed his name put on his rest time towel.  Since he has an Angry Birds towel, we downloaded an Angry Birds font.  He picked the bright blue glitter HTV.  I was a little worried about how it would turn out, but it was great.  Now I'm going to add the other boys names to their beach towels!

Saturday, July 27, 2013

A Visit from the Tooth Fairy

My daughter recently lost her first tooth and the tooth fairy was ready at our house!  I found great ideas on Pinterest and went a little wild:)  The reaction when she saw what the tooth fairy left was priceless.
 Grandma and Grandpa have a fairy door on one of their trees and the kids are very entertained by it.  Once I saw this  I knew the tooth fairy had to leave a door at our house.  This door magically appeared over night when the tooth fairy stopped by to collect the tooth.  It is placed in between the wall that separates the kids' bedrooms, so easily accessible for the tooth fairy to visit either child;)
 Well what did she put her tooth in?
 This cute pouch.  I used the dimensions from this tutorial to make the pouch.  Then I had Grandma (thank you!) sew it together quick and sew on the ribbon so it would loop around the door knob.  I then used my Silhouette and Amy Robison's awesome tooth fairy kit to cut out heat transfer for the pouch and then ironed it on.  The "tooth fairy" then attached a mini key to her door on the ribbon of the bag.  We also used Amy Robison's Lost Tooth Certificate to document the big day.  So much fun!
Since we did my daughter's pouch I went ahead and made one for my son as well, now I just have to hang onto it until he looses his teeth in a few years!

Sunday, June 2, 2013

Falcons Apron

My friend, Lisa, made these aprons for her husband and son.  She wanted to add a little something to them, so I added the large falcons using Heat Transfer Vinyl.  I already had the design in my Silhouette library, so I just cut each layer out and used my heat press to stick it down.  I have a feeling that this father/son duo will be grilling outside together every Sunday this fall!

Friday, May 31, 2013

Pirates Aaaarg Cool

To kick off the summer break we have been doing theme weeks at our house before things get to busy with other activities.  This week was Pirate Week.  Oh my, there are soooo many fun things to do with Pirates!  We made Pirate food, pirate shirts, pirate crafts, pirate hats, read pirate books, watched Jake and the Neverland Pirates, painted treasure chests and went on a treasure hunt.  I still have way more ideas so I think we are totally going to have another pirate day sometime this summer.  Here are just a few of the things we did . . . 
Made pirates to eat after seeing this.  My kids thought their pirates needed arms instead of a sword, I think they just wanted more pretzels:)
I had way to much fun making these pirate shirts.  For the "girl" pirate I used glitter pink heat transfer for the bandanna and glitter black heat transfer for the eye patch.  Got my inspiration for these from here.
We also made pirate spy scopes/telescopes.  For the pirate hats I followed this tutorial and then cut out the skull and bones with fuzzy white heat transfer and ironed it to the hat.  I didn't have white thread (or I couldn't find it anyway) so I didn't do the extra stitching around the edge, but the kids enjoyed them anyway:)  The eye patches I ordered from OTC.  This pirate is also holding her treasure chest.  I found these at JoAnn's for $1/each and let the kids paint them.  I also made pirate maps  -- torn the edges off brown craft card stock and drew a simple picture map of places to go around the house with a big "x" where I had a little box with some goodies in it.
A very fun and crafty week!

Wednesday, March 27, 2013

Heat Transfer Gifts

 We had a cousin that gave birth to twins last month so I made these onesies as part of their gifts.
Some family friends had little girls celebrating their 4th and 1st Birthdays this month so I made these t-shirts.  I was happy to be able to use more pink glitter heat transfer!

Sunday, March 17, 2013

St. Patrick's Day Shirt

I asked my daughter if she wanted to have a shirt for St. Patrick's Day and showed her some of the designs I had purchased from Silhouette.  When she saw this one there were holes in the font for "PROOF."  She asked if I could put rhinestones in those holes. I said, "You bet kiddo!"  So here is the final product.

Wednesday, February 27, 2013

Valentine's Decorations


 For Valentine's Day I used my Silhouette to make this shirt for my daughter.  I used white flocked heat transfer and black glitter heat transfer.
I also had grand plans to get some Valentine's Day Banners done this month as decorations.  Did not get them done in time for Valentine's Day this year, but I did still get them done in the month of February and they are ready to go for next year!

Thursday, January 31, 2013

T-Shirts

 
First, I made these two for my nephew, Holden, and his little sister Leah.  I hear she is a little diva already, at 3 days old, so I was super excited that I used some pink glitter HTV!  The crown and the tiara are shapes from the silhouette store, but I designed the text and how it is curved or placed on the shirt.

Also, I ran across this shirt on facebook and couldn't resist making it for Gail for her birthday.  I traced the biohazard symbol, but put the rest together myself.  Hope you had a great birthday, Gail!

Sunday, January 27, 2013

Shirt Extravaganza

So this month I had Erin's heat press on loan for a week.  Of course I had grand plans, but saved them for the night before I needed to get it back to her.  Yikes!  I did get 7 shirts done in 3 hours though - not too shabby if you ask me.  (2 are not posted yet as they are gifts and I don't want them to see them yet!)
I made a Vikings shirt for my hubby.  Have to combat all the Packer Love on the blog here!
 I am in love with the pink glitter heat transfer that I purchased a while back.  I've been looking for an excuse to use it to make something for myself.  When I saw this quote while browsing the internet I knew how I could use it:)  I added a little flower on the corner of the shirt for a little more oomph of it!
My cousin had a new baby girl this month so I used the pink glitter to decorate a onesie and did a big brother super hero shirt again as well.

My daughter is into anything with ponies, unicorns and the like.  And being a young girl of course she seems to gravitate toward pink, purple and GLITTER.  So she got this Pegasus unicorn out of pink glitter as well.  She loves it and has worn it just as soon as it comes out of the wash.

More Packer Love

 Allison saw the shirt that Erin did for her husband and being a big Packer fan herself she wanted to make some more.  So she went a  little Packer crazy and made 3 (one for her and two for her second cousins).

Under the Sea Shirt

Amy created this shirt for her SIL's birthday.  Inspiration came from this. Amy took it another direction.  She came up with an under the sea theme so when you cross your arms the fish are swimming in the sea.  She used her Silhouette shapes and heat transfer.  Fun.

Monday, December 31, 2012

Glow in the Dark Shirt

I still had some glow in the dark heat transfer left over from other projects so when I saw this shirt, I thought - ooooh I can totally make the moon out of that!  So that is exactly what I did:)  I made the moon out of glow in the dark heat transfer and then I did the wording out of silver heat transfer.  I gave it to my book doctor sister as a birthday present and then made one for myself as well as I seem to stay up way to late - often stuck in a book.

Friday, December 28, 2012

Green Bay Packers Shirt


I let Brandon open up a Christmas gift on Sunday so he could wear it while watching some football.  Since he is a very tall guy, I had him pick out a Land's End Tall shirt that would fit him well.  I used my cameo to cut out the letters.  It took a bit ti figure out how to properly weed the Swiss cheese font, but I think it turned out well.  Of course, now all the kiddos want them as well....perhaps I can get that done in time for February!

Monday, November 26, 2012

Reindeer Shirt

 
I saw this shirt in a Silhouette Facebook group I'm in and knew I HAD to make this for Emery.  It was fun to work on my tracing skills and I had the onesie and all of the heat transfer vinyl just lying around, so it came together quite quick.  I've got more shirts planned like this one!

Saturday, November 17, 2012

Train Party Decorations

My son turned 2 and we threw him a train party.  Here are some of the decorations I did for the party.
 I made him a little shirt to wear for the day with my Silhouette and heat transfer.  I got the "Choo Choo" from one of the train designs I had bought from the online store.  I added it to a different train I had and added the "2".
 I cut two 3 inch strips from 12x12 scrapbook paper and then wrote on them.  I cut the circles out with the Silhouette and used basic streamers to decorate the gate leading to the basement. 
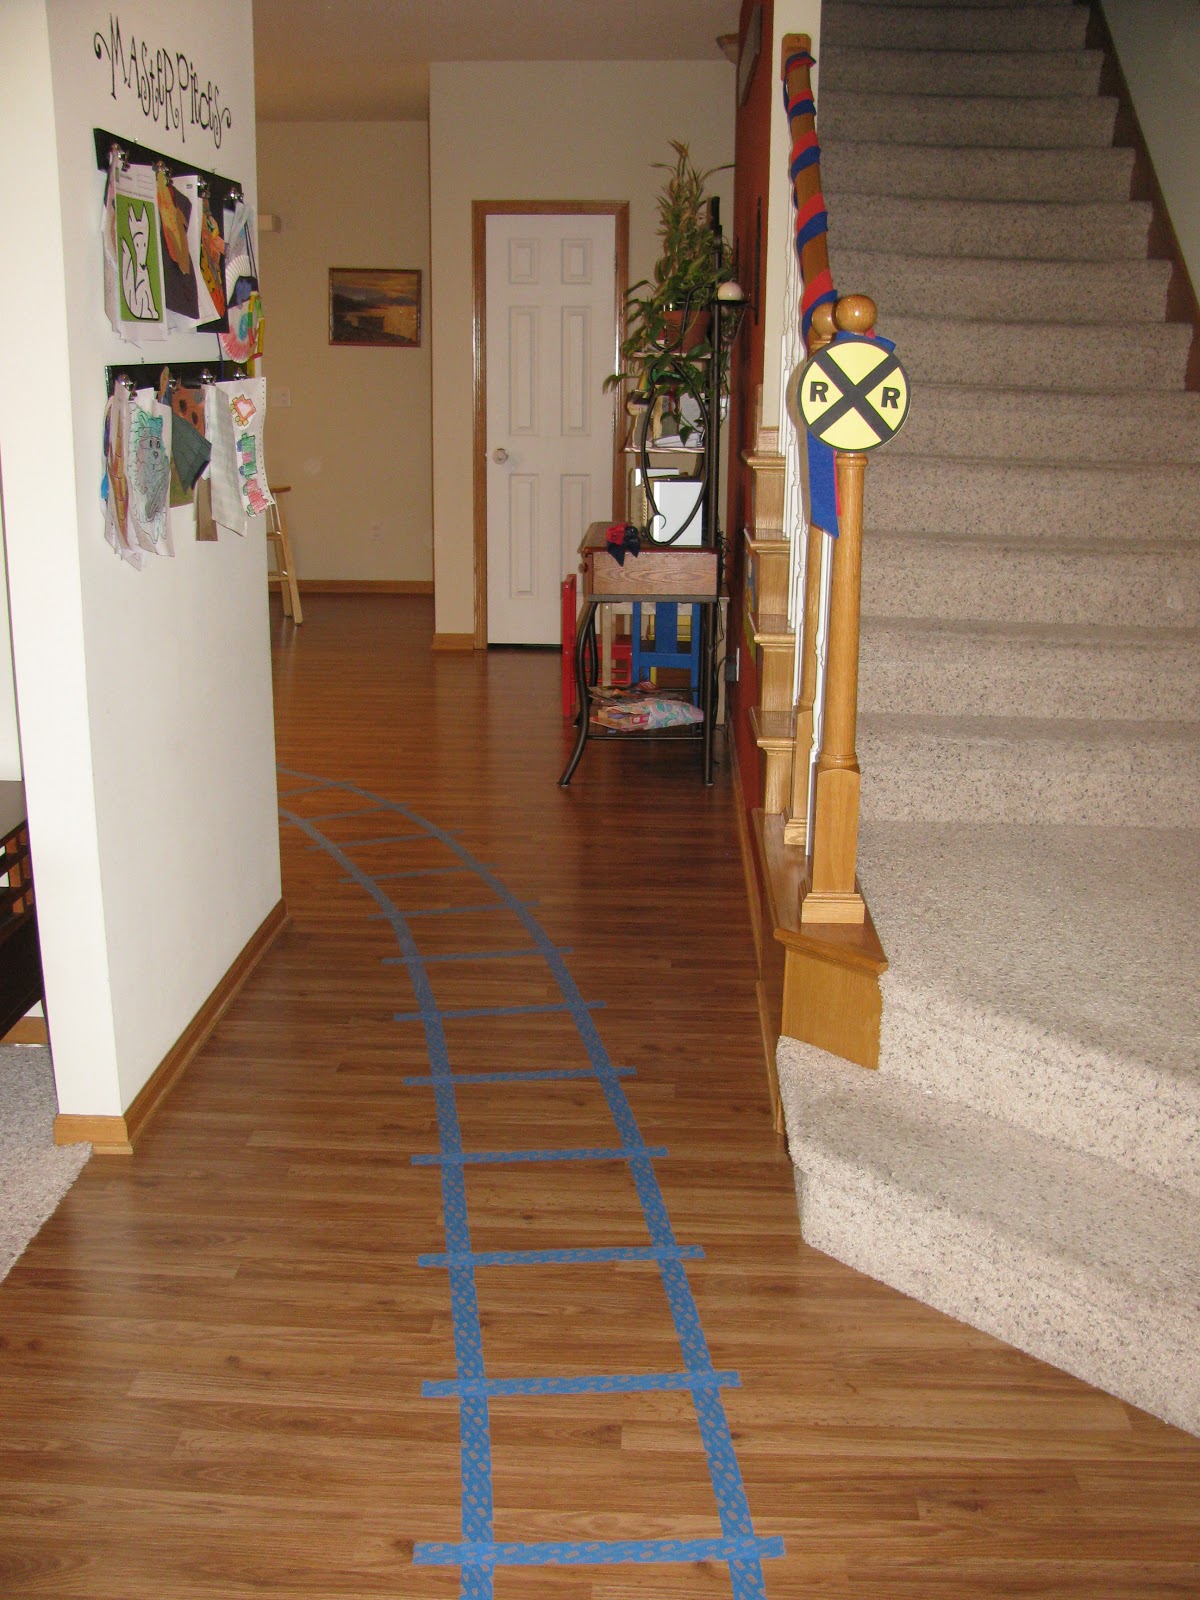
We made train tracks on the floor with painters tape (definitely a hit and I'm sure they will be up for a few days). Got this idea from searching train party ideas on Pinterest -- Lots of variations on this.  Then I made this Rail Road Sign from a shape out of the Silhouette Store.